8.2. Telemesh
- Find the
versions.gradlein the Telemesh root directory of the repo and any new support library reference should be added here. - Any support library on app-level
build.gradleshould be added in this way
implementation deps.support.app_compat
implementation deps.support.design
implementation deps.constraint_layout
implementation deps.support.recyclerview
implementation deps.support.cardview
Viperdependency should be added in the same way inside the app-levelbuild.gradle- The Telemesh app is using different
URLsfor different services. Preparing all those services is time-consuming as well as tedious too. But if you are a contributor to Telemesh app, you don’t need to worry at all about those monotonous tasks. All theURLsand other permission related information are provided in a.sofile as solid package to give you a staging environment the same as production for development purposes. Just download the project and run.
But, we don’t give the guarantee of continuous services for the staging environment, as it’s only for development and testing purposes.
- If you want to deploy your server machines and services you need to do a little more work. Assuming that you already have the services installed on the online machine(s), please follow the steps below.
If android NDK and CMake are not installed on your development machine, please download and install them using SDK manager. For more help visit https://developer.android.com/studio/projects/install-ndk#default-version
Create a directory named cpp under the main package of the Telemesh app.
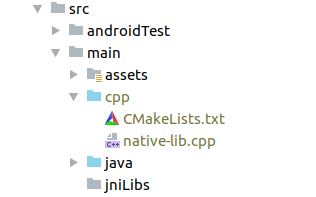
Put/Create the following two files into the cpp folder.
- CMakeLists.txt
- native-lib.cpp
CMakeLists.txtbuild script can be prepared from the following link: https://developer.android.com/studio/projects/configure-cmake#create_scriptIf you need any help on any stage of work and you want to communicate with us please join our Discord channel.
- Any change or addition of credentials has to do under
native-lib.cppfile. Copy the following code snippet and paste it into this file.#include <jni.h> #include <string> extern "C" JNIEXPORT jstring JNICALL Java_com_w3engineers_unicef_telemesh_data_helper_AppCredentials_getBroadCastToken(JNIEnv *env, jobject) { std::string broadcast_token= "Here have to set your broadcast token"; return env->NewStringUTF(broadcast_token.c_str()); } extern "C" JNIEXPORT jstring JNICALL Java_com_w3engineers_unicef_telemesh_data_helper_AppCredentials_getBroadCastUrl(JNIEnv *env, jobject) { std::string broadcast_url = "Here have to set your broadcast url"; return env->NewStringUTF(broadcast_url.c_str()); } extern "C" JNIEXPORT jstring JNICALL Java_com_w3engineers_unicef_telemesh_data_helper_AppCredentials_getParseUrl(JNIEnv *env, jobject) { std::string parse_url = "Here have to set your parse server url"; return env->NewStringUTF(parse_url.c_str()); } extern "C" JNIEXPORT jstring JNICALL Java_com_w3engineers_unicef_telemesh_data_helper_AppCredentials_getParseAppId(JNIEnv *env, jobject) { std::string parse_app_id = "Here have to set your parse app id"; return env->NewStringUTF(parse_app_id.c_str()); } extern "C" JNIEXPORT jstring JNICALL Java_com_w3engineers_unicef_telemesh_data_helper_AppCredentials_getAuthUserName(JNIEnv *env, jobject) { std::string auth_user_name = "Here have to set your Authenticate name"; return env->NewStringUTF(auth_user_name.c_str()); } extern "C" JNIEXPORT jstring JNICALL Java_com_w3engineers_unicef_telemesh_data_helper_AppCredentials_getAuthPassword(JNIEnv *env, jobject) { std::string auth_password = "Here have to set your authenticate password"; return env->NewStringUTF(auth_password.c_str()); } extern "C" JNIEXPORT jstring JNICALL Java_com_w3engineers_unicef_telemesh_data_helper_AppCredentials_getFileRepoLink(JNIEnv *env, jobject) { std::string file_repo_link = "Here have to set your file download repo link"; return env->NewStringUTF(file_repo_link.c_str()); } extern "C" JNIEXPORT jstring JNICALL Java_com_w3engineers_unicef_telemesh_data_helper_AppCredentials_getConfiguration(JNIEnv *env, jobject) { std::string config_file = "Here have to set a Json file as string like below”; return env->NewStringUTF(config_file.c_str()); }JSON file for configuration:
{
  "config_version_name":"0.0.1",
  "config_version_code":1,
  "token_per_mb":1.0,
  "default_network_type":2,
  "token_guide_version":0,
  "GIFT_DONATE_LINK" : "Here set your gift donate link",
  "wallet_rmesh_available": false,
  "network": [
    {
      "network_type":2,
      "network_name":"Kotti",
      "network_url":"Here set network url",
      "currency_symbol":"ETC",
      "token_symbol":"TMESH",
      "token_address":"Here set your token address",
      "channel_address":"Here set your channel address",
      "gas_price":25000000000,
      "gas_limit":800000,
      "token_amount":0,
      "currency_amount":0
    }
  ]
}
For more query please join us through Discord channel.
- If any new credential is added have to add an API into AppCredentials.java class to access that credentials.
- Delete the following two files from jniLibs package.
- armeabi-v7a
- x86
- Find the externalNativeBuild {} tag from app-level build.gradle and uncomment this line: path
src/main/cpp/CMakeLists.txt- Execute Gradle sync
- Now check the
ViperUtil.javaclass and find the constructorViperUtilwhere we use the above credentials
protected ViperUtil(UserModel userModel) {
  try {
    context = MainActivity.getInstance() != null ? MainActivity.getInstance() : TeleMeshApplication.getContext();
    String appName = context.getResources().getString(R.string.app_name);


    String AUTH_USER_NAME = AppCredentials.getInstance().getAuthUserName();
    String AUTH_PASSWORD = AppCredentials.getInstance().getAuthPassword();
    String FILE_REPO_LINK = AppCredentials.getInstance().getFileRepoLink();
    String PARSE_APP_ID = AppCredentials.getInstance().getParseAppId();
    String PARSE_URL = AppCredentials.getInstance().getParseUrl();
    String CONFIG_DATA = AppCredentials.getInstance().getConfiguration();


    SharedPref sharedPref = SharedPref.getSharedPref(context);
    String address = sharedPref.read(Constants.preferenceKey.MY_WALLET_ADDRESS);
    String publicKey = sharedPref.read(Constants.preferenceKey.MY_PUBLIC_KEY);
    String networkSSID = sharedPref.read(Constants.preferenceKey.NETWORK_PREFIX);

    initObservers();

    if (TextUtils.isEmpty(networkSSID)) {
      networkSSID = context.getResources().getString(R.string.def_ssid);
    }

    viperClient = ViperClient.on(context, appName, context.getPackageName(), networkSSID, userModel.getName(), address, publicKey, userModel.getImage(), userModel.getTime(), true)
    .setConfig(AUTH_USER_NAME, AUTH_PASSWORD, FILE_REPO_LINK, PARSE_URL, PARSE_APP_ID, CONFIG_DATA);

  } catch (Exception e) {
    e.printStackTrace();
  }
}
For wallet design currently, we are using default design from
ViperIn Telemesh we are using
Parseserver to store analytics data from local mesh.Please follow this Parse installation process in Android.
To configure parse with Telemesh, follow the steps are given below:
Step 1: Add parse server Android SDK version in
version.gradleStep 2: If you want to deploy your own parse server in any platform, you have to update parse server
URLand parse serverAPP-IDin the Telemesh project.Step 3. You have to add the
PARSE_URLandPARSE_APP_IDin the GradleBuildValues interface that located in Constants class.The sample Parse model (Table) structure is
ParseObject parseObj = new ParseObject(“table_name”);
parseObj.put(“column_name”,”value”);
………….
parseObj.saveInBackground();
The parse server table structure and save/update process located in
parseapipackage.Parse Server installation Inside a Docker container
$ git clone https://github.com/parse-community/parse-server
$ cd parse-server
$ docker build --tag parse-server .
$ docker run --name my-parse-server -p 1337:1337  -d parse-server --appId APPLICATION_ID --masterKey MASTER_KEY --databaseURI mongodb://mongo/test
Happy Coding :)
After successful build, install the apk into any Android device (minimum android version Lollipop - 5.0)
and you need to download TeleService apk from Telemesh inside which will provide multihop mesh support into Telemesh.